
We are a 4th generation family owned and operated hatchery offering over 202 varieties of poultry shipped directly from our facility here in Missouri. It’s our mission to enhance your life by providing you with quality poultry for showing, meat, enjoyment, eggs or pets. We specialize in hatching purebred poultry and shipping day old chicks right to your local post office since 1936.
Cackle Hatchery® has been raising quality U.S. Pullorum clean poultry since 1936 and ships throughout the United States including Alaska and Puerto Rico.
Cackle’s Chick Hatchery and Cackle’s Chicken Breeder Farms selectively breed and raise our own breeding stock. This stock produces our own eggs which are hatched from our hatchery here in the heart of the Missouri Ozarks. We have 88 years of focused genetic selection to produce disease resistant and productive poultry for public use.
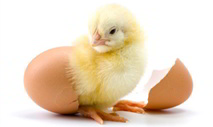
CHICK SEASON®
Chick season typically begins in the spring and lasts through the summer months for most breeds of poultry. Where they differ, however, is how long that season lasts. For example, chickens and other types of poultry that are specifically bred for egg production may hatch chicks longer than those of more exotic breeds.
What sets Cackle Hatchery apart from many other hatcheries is that we allow Mother Nature to dictate chick season. That means we choose not to use artificial lights or other unnatural methods to keep our hens laying year-round. While this may not be the most convenient method, we believe it’s the right method for producing the best and healthiest chicks.
So, while chick season for each poultry breed may fluctuate based on Mother Nature, you can get a general idea of when to order chicks by viewing our availability chart.